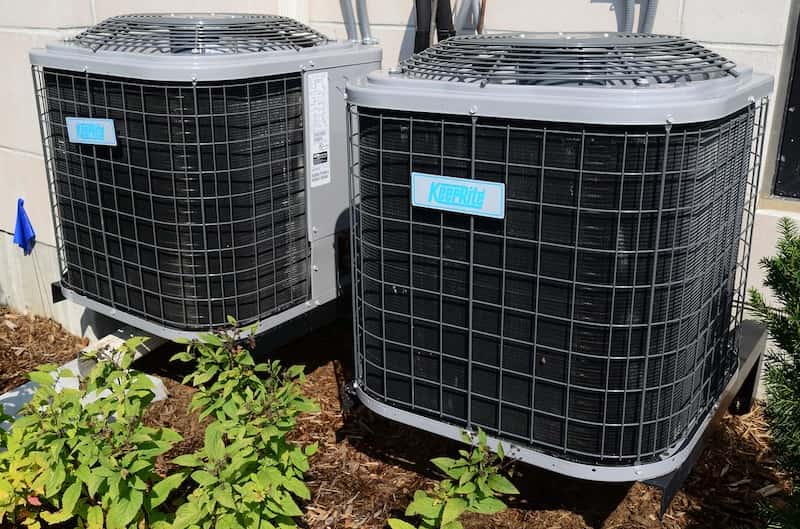
Heating and cooling are two of the most important aspects of your home’s comfort.
When your HVAC system fails, it is one of the first things you will notice.
Before you begin your search for an HVAC unit suited to your needs, you must grasp all of the specifics involved in this undertaking.
We’ve created a short and complete guide on what to expect.
This guide will answer all the essential questions, from finding a reliable contractor to prepping your home before the HVAC replacement process begins.
Set Your Expectations
Estimate the Costs
It is advised to get replacement and installation quotes from at least four to five reputable HVAC businesses or contractors in your area before starting the replacement process.
When the HVAC contractor arrives at your property, they will take the following measurements:
- Square footage and calculate the load based on the temperature in your location.
- Your properties size
- The quality of the building’s insulation, or its capacity to contain conditioned air
Finding the Right Contractor
Do some research and compile the licensed and insured HVAC contractors in your area, and then arrange a visit with each.
Allow each of them to take measurements and check your existing system.
Allow each of them to take measurements and check your current system.
Request for a copy of the most recent HVAC license and insurance policy.
You need the license number so you may follow up to confirm the license is current and their insurance is up to date.
Make sure the quoted estimates are dated, signed, and cover all areas of the replacement costs, including:
- Start and completion date
- Stages of the job
- New HVAC system
- Material costs
- Cleaning costs
- Removal of previous unit costs.
Furthermore, it is essential to know what’s included in your warranty.
The Appropriate HVAC Unit Size
Here’s a handy table to help you figure out what to expect:
| Area | Appropriate Size(tons) |
| 600 – 1100 sq.ft | 1.5 |
| 900 – 1400 sq.ft | 2 |
| 1200 – 1650 sq.ft | 2.5 |
| 1500 – 2100 sq.ft | 3 |
| 1800 – 2300 sq.ft | 3.5 |
| 2100 – 2700 sq.ft | 4 |
| 2400 – 3300 sq.ft | 5 |
You should also examine your area’s climate to ensure you have the adequate tonnage to manage the temperatures in your location.
Before purchasing a new HVAC system, conduct research on the appropriate size unit for your property.
If you buy a bigger/smaller unit for the square footage of your property, it will result in wasted energy and increased electricity costs.
Furthermore, check the energy efficiency ratings for each unit.
Energy Star certified products guarantee you choose a system that will perform at peak efficiency all year and save you money over the system’s life.
The Replacement Process
Once you’ve figured out a reliable contractor and determined the HVAC unit most suited to your needs, you’re ready to proceed with the installation.
Some things you can do before the installation team arrives to help speed up the process include moving valuable items to a safer location.
Contractors may be reluctant if asked to move valuable items.
You should also move any pets to a different location until the job is done.
1. Expected Time Duration for the Installation Process
Typically, HVAC replacements take a single day.
However, certain more complicated upgrades may require the installation to be finished the next day.
When the contractor and his team arrive at your property, they will inspect the project site and begin setting up their workstations (typically one or two helpers).
2. Setting up the Area for Installation
The installation team should protect flooring in work areas by laying drop cloths or other protective material.
Secondly, furniture and other household belongings should be moved to safe locations.
Finally, in case of heavy furniture and items that can not be moved, they should be covered with plastic for protection.
3. Removing the Old HVAC System
Before replacing the HVAC unit, the team must remove the old air conditioning unit.
That may entail getting access to attics, crawl spaces, basements, common locations for the HVAC system.
Then, after turning off the HVAC unit, the staff will drain any remaining refrigerant from the system and begin replacing the old unit.
4. Ductwork Repair/Modification
Duct repair or replacement may be necessary, depending on the scale of your project.
These repairs or modifications may increase the installation time by a day, so make plans accordingly.
5. Installing Your New HVAC Replacement
After removing the old unit and repairing or replacing the ductwork, the team will install your new HVAC unit.
The unit may come with the following components:
- Inside air handler/ evaporator
- Outside compressor
- Refrigerant Supply Lines
- Condensate Drain Lines
- Thermostat
- Condensate Pump
Another thing to keep in mind is that, while most HVAC contractors can upgrade wiring and circuit breakers for the installation, any adjustments to the property’s circuitry may necessitate the services of a professional electrical contractor.
6. Testing the HVAC Unit
After the HVAC installation is complete, pressure and vacuum tests are performed.
Following a thorough inspection of the new HVAC system, refrigerant is added. Finally, the system is activated to confirm that all components are operational.
After the successful replacement of your HVAC unit, your contractor should explain the functioning of the new system and go over warranty information.


Recent Comments